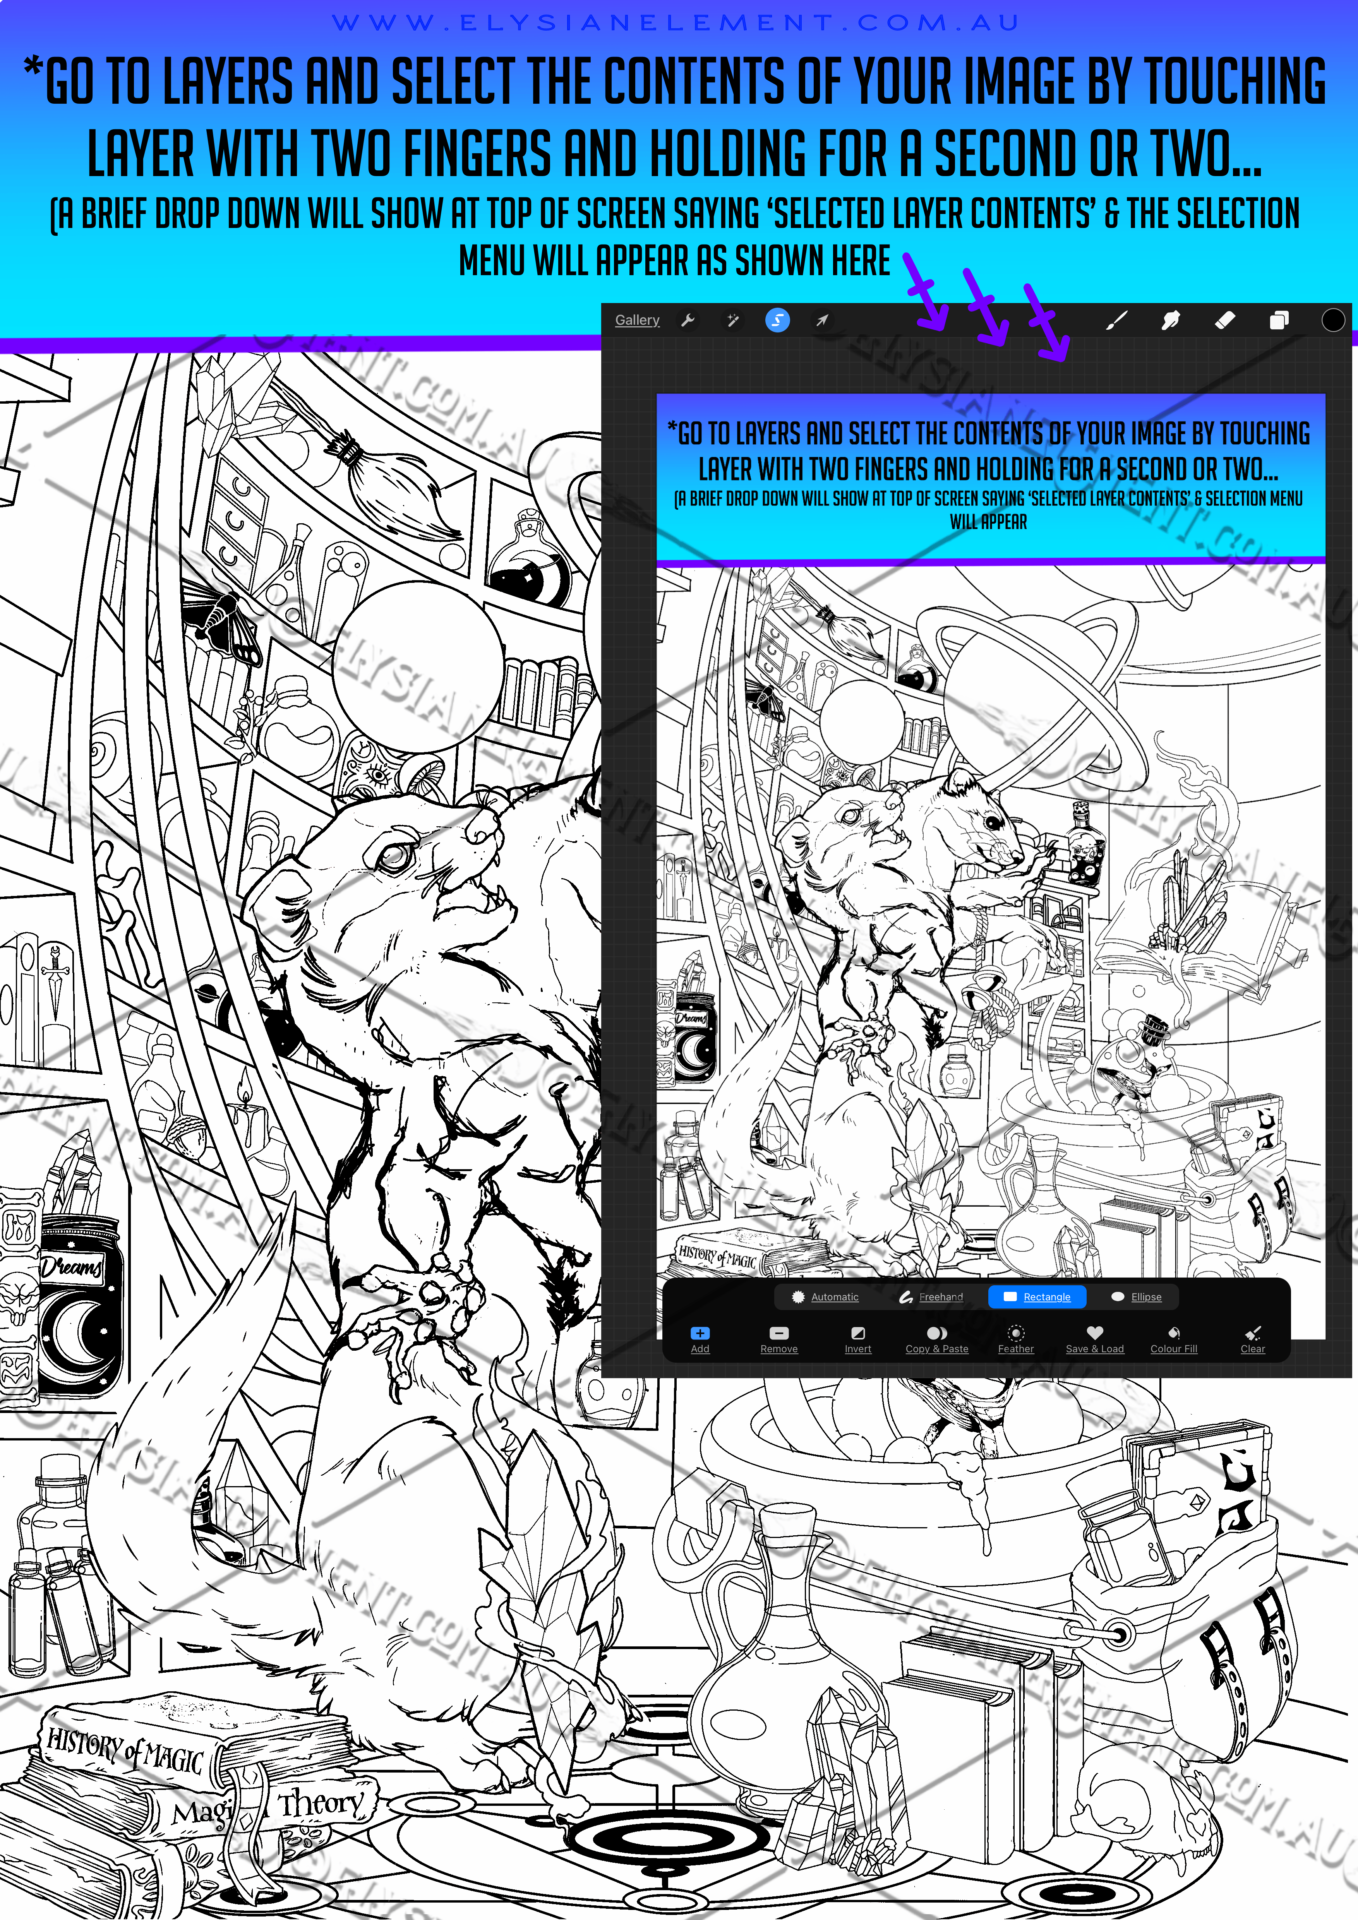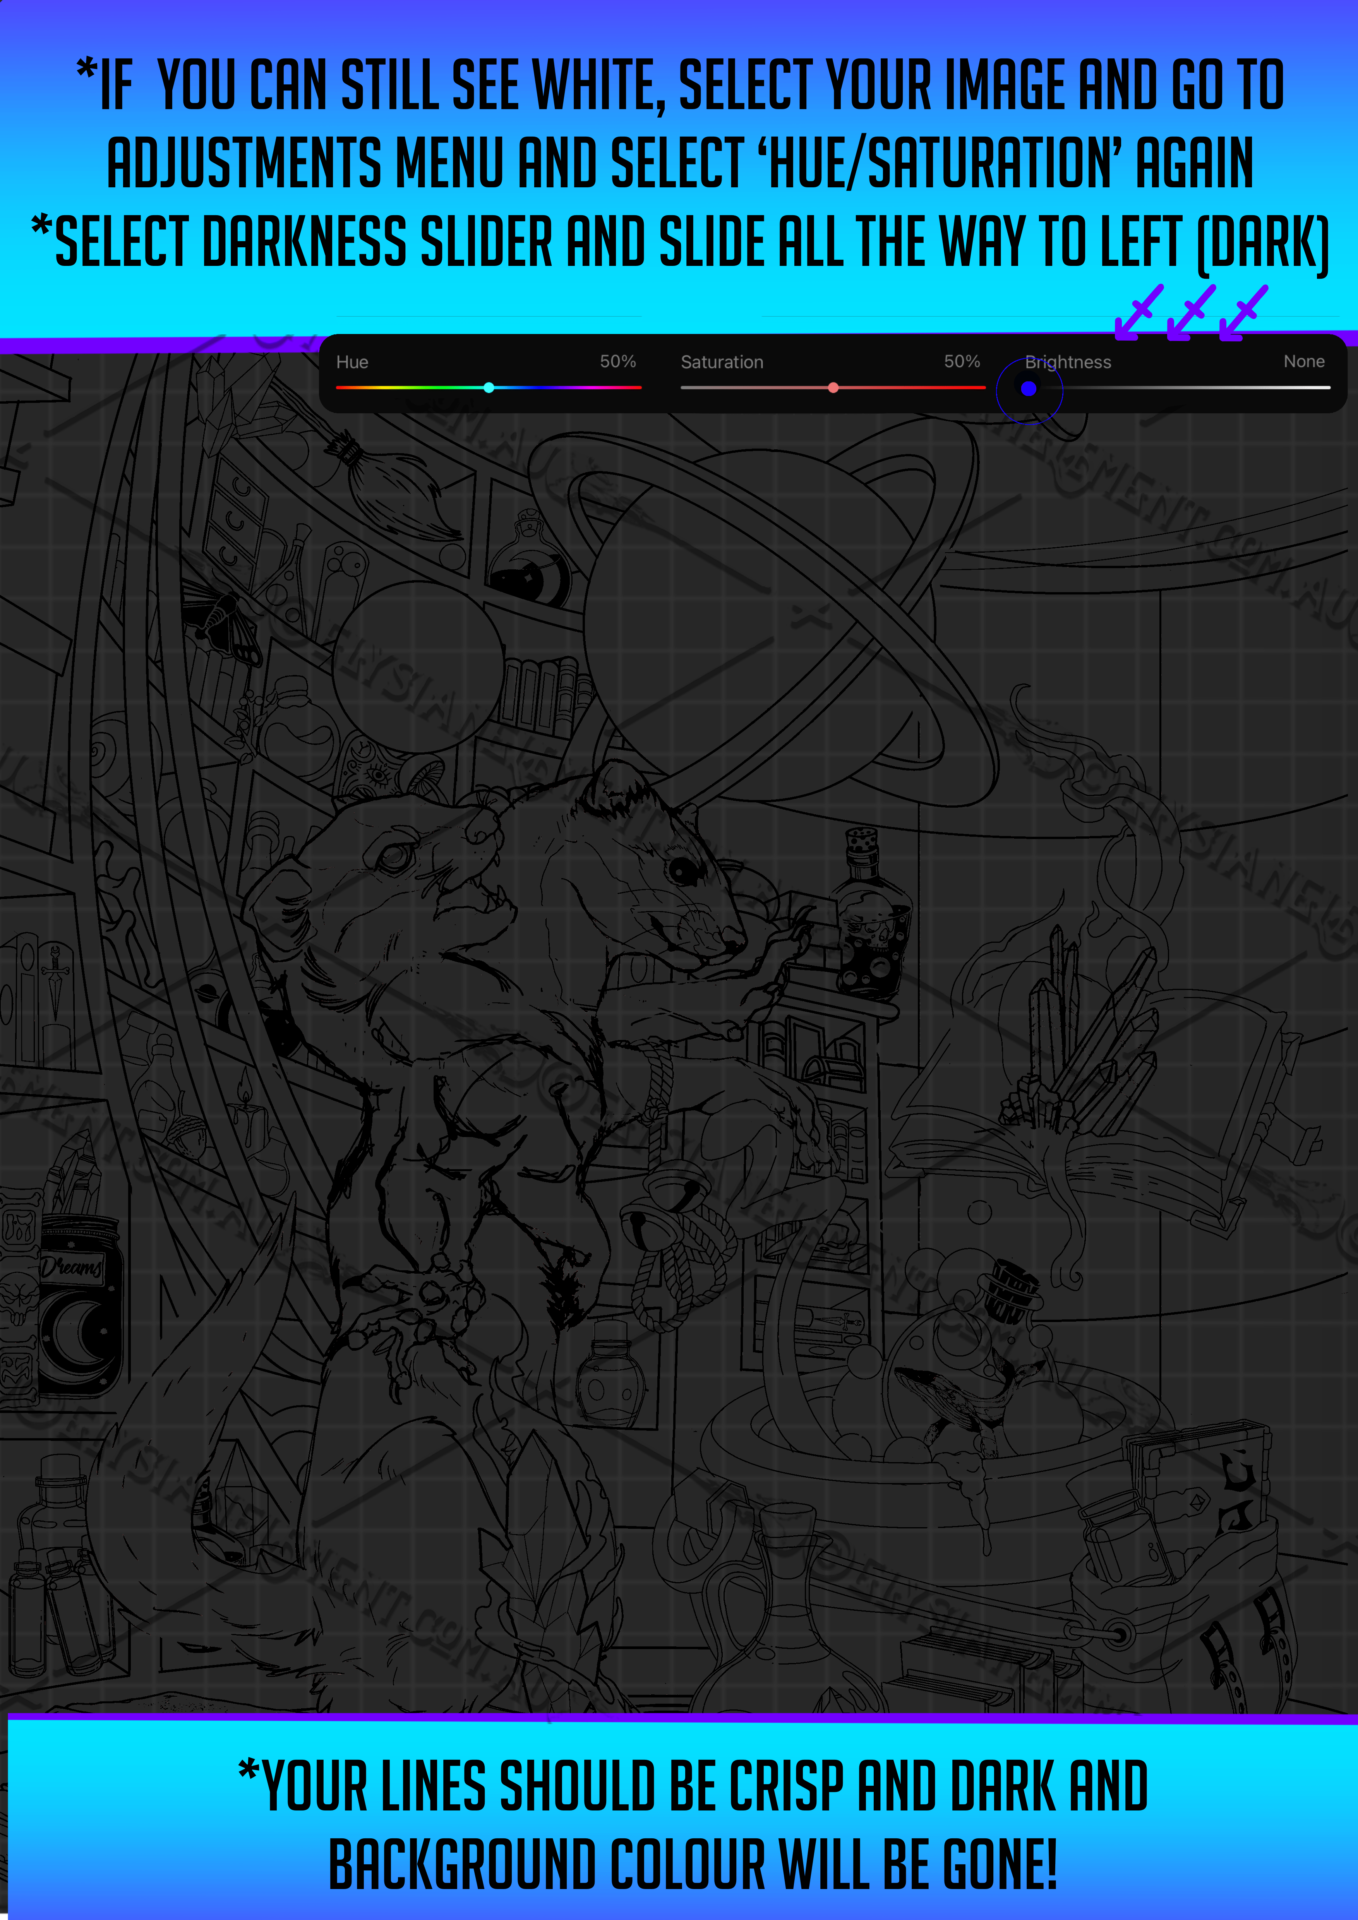
Tutorial: achieve opacity w/ masks
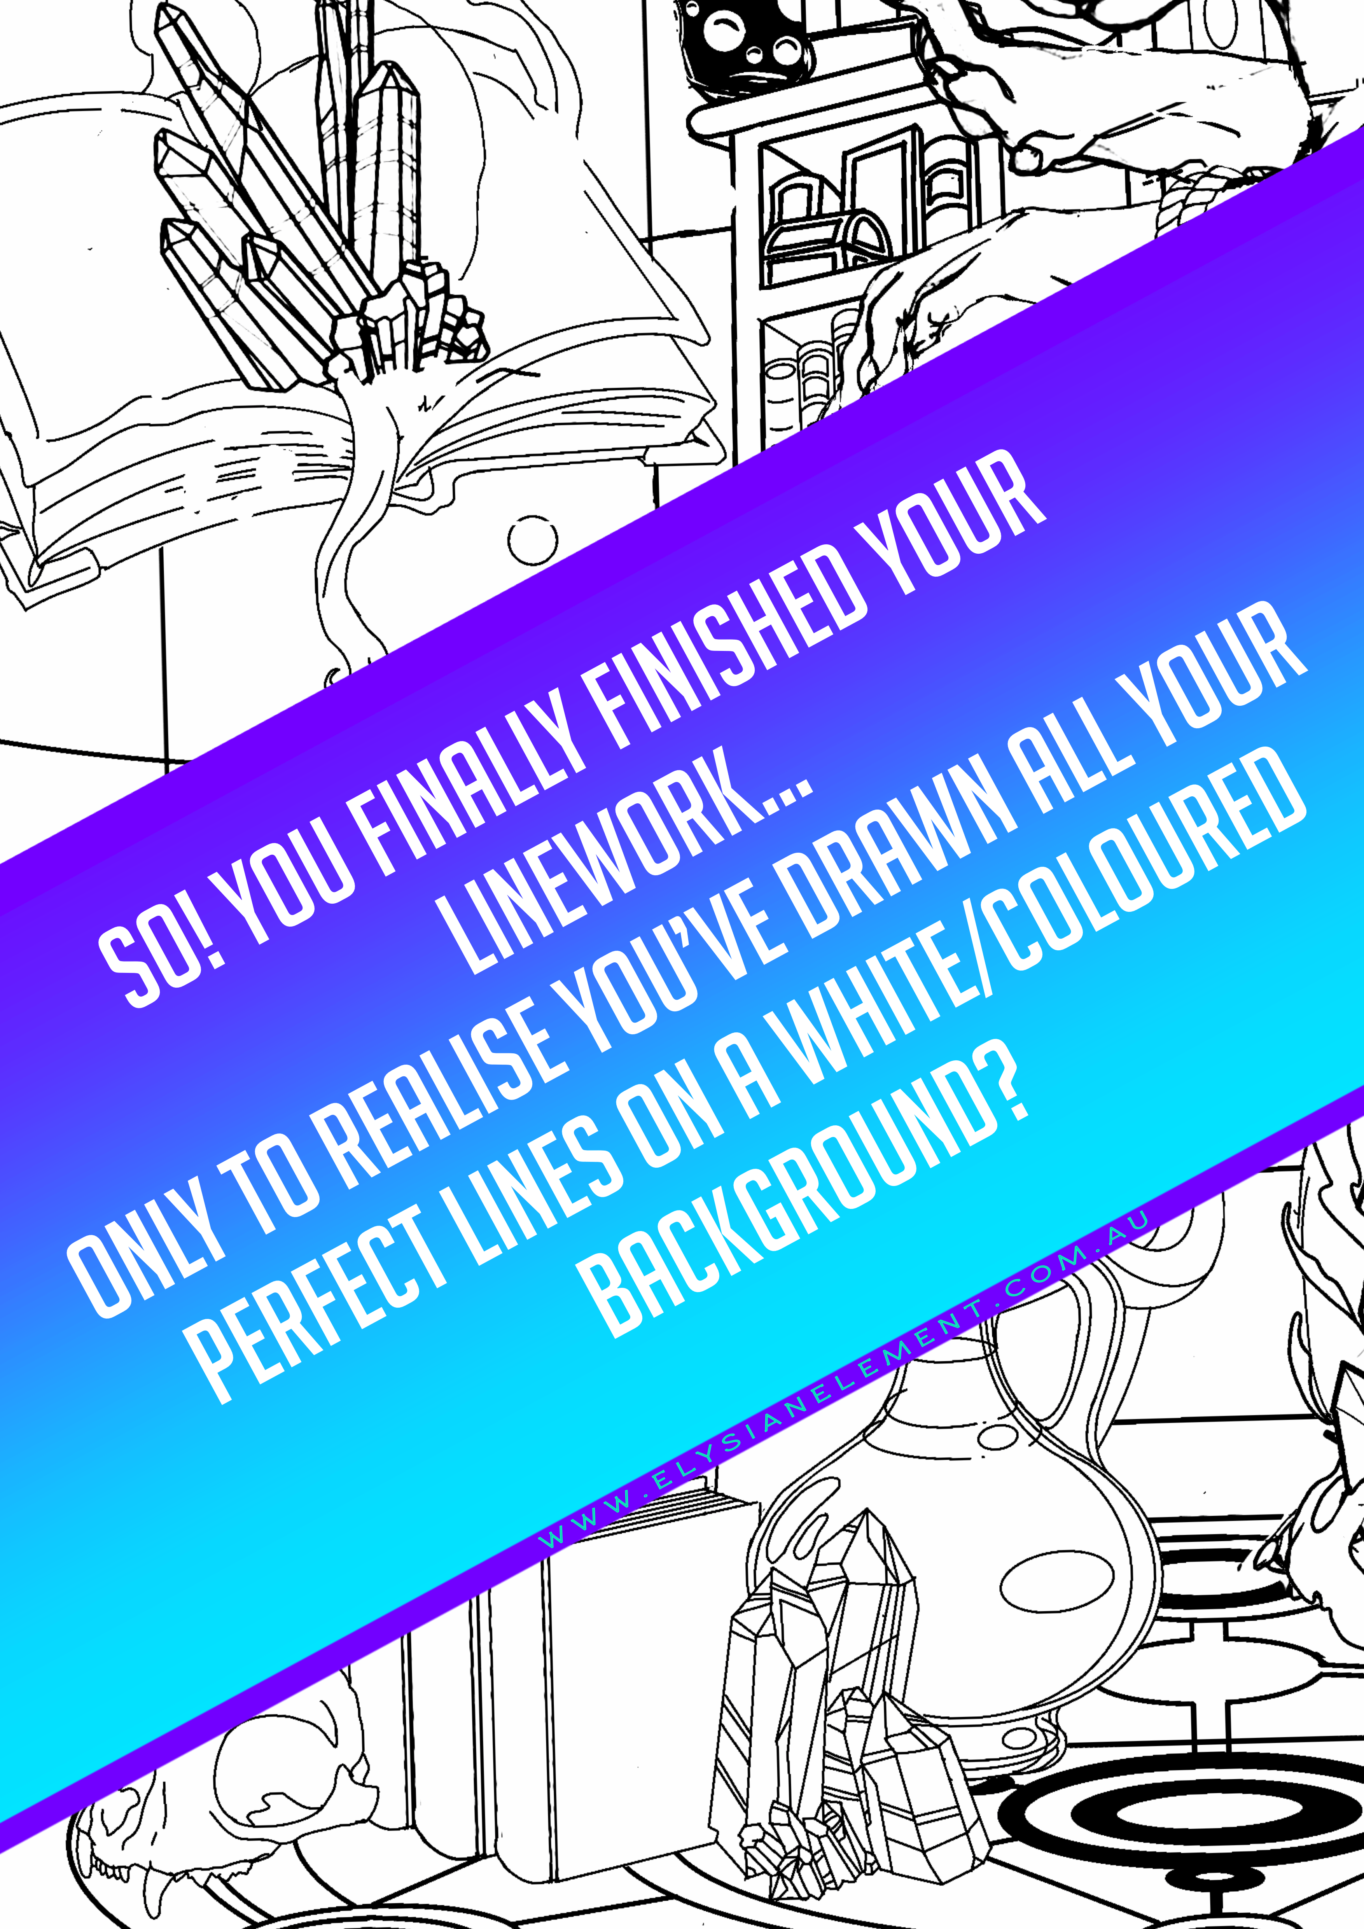
We’ve all done it, been so immersed in what we are drawing that we don’t notice the flawless lines we just spent hours perfecting have been done on a layer with a fill. ~ The horror ~ This is a simple work around I have put together as a tutorial that will hopefully help you understand how tweaking some settings with opacity and masks can work even more in your favour.
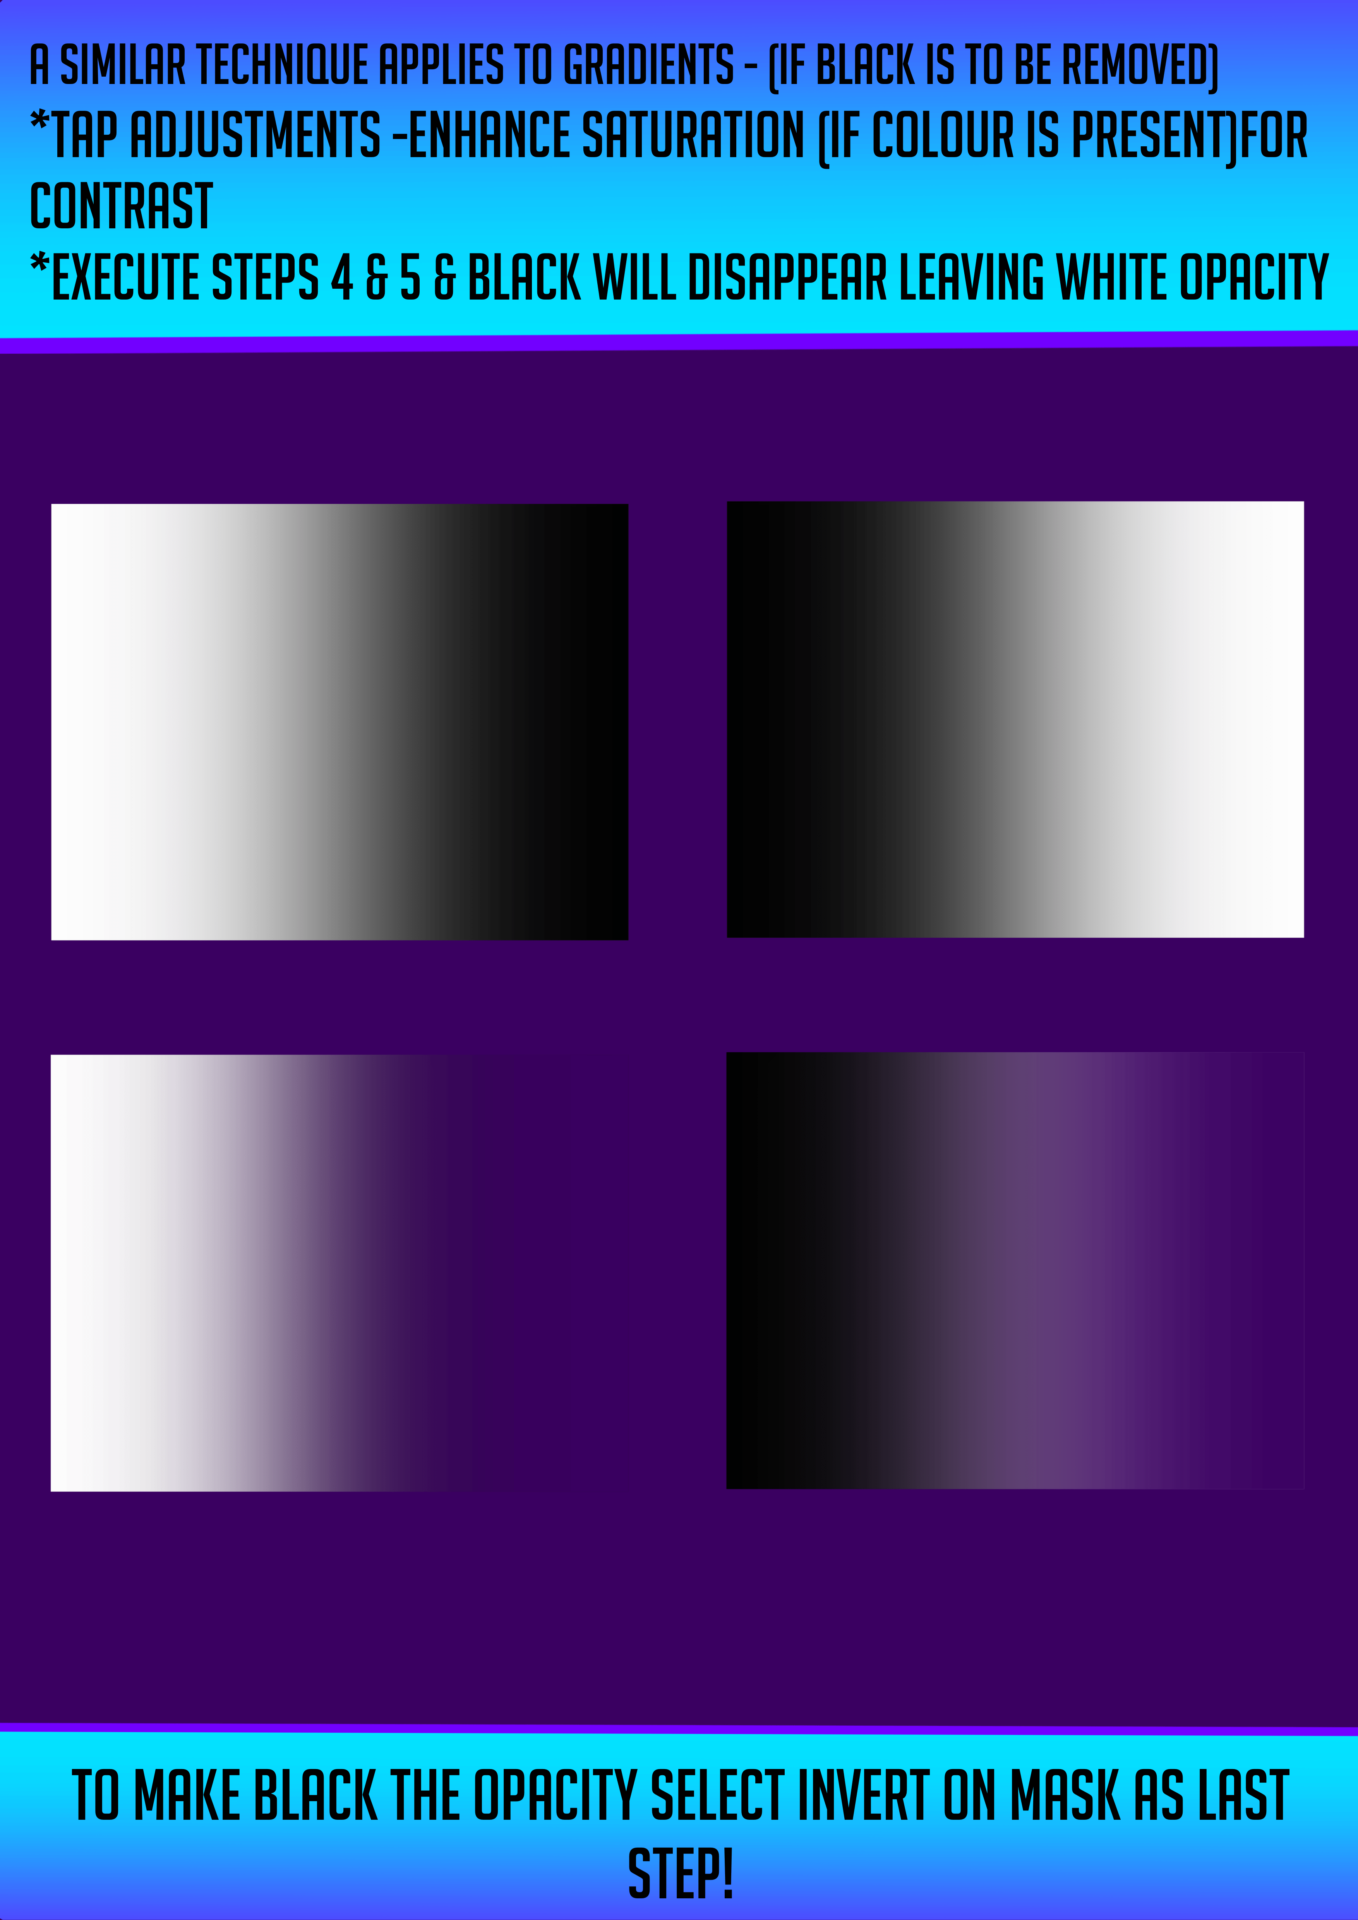
This tutorial will also give a basic understanding of how to use this trick to separate gradients for transparent elements & pngs.
If you’re looking to soften edges, add subtle shading, or create smooth blends in your Procreate artwork, mastering layer masks is essential. In this tutorial, I walk you step-by-step through how to use masks to control opacity in Procreate — without permanently erasing your artwork.
Instead of lowering opacity manually or brushing directly on your artwork, masks offer a non-destructive way to fade, erase and reveal with full control. This method is perfect for:
Shading and highlights
Feathered edges and soft transitions
Adding texture without altering the base layer
Creating depth and lighting effects
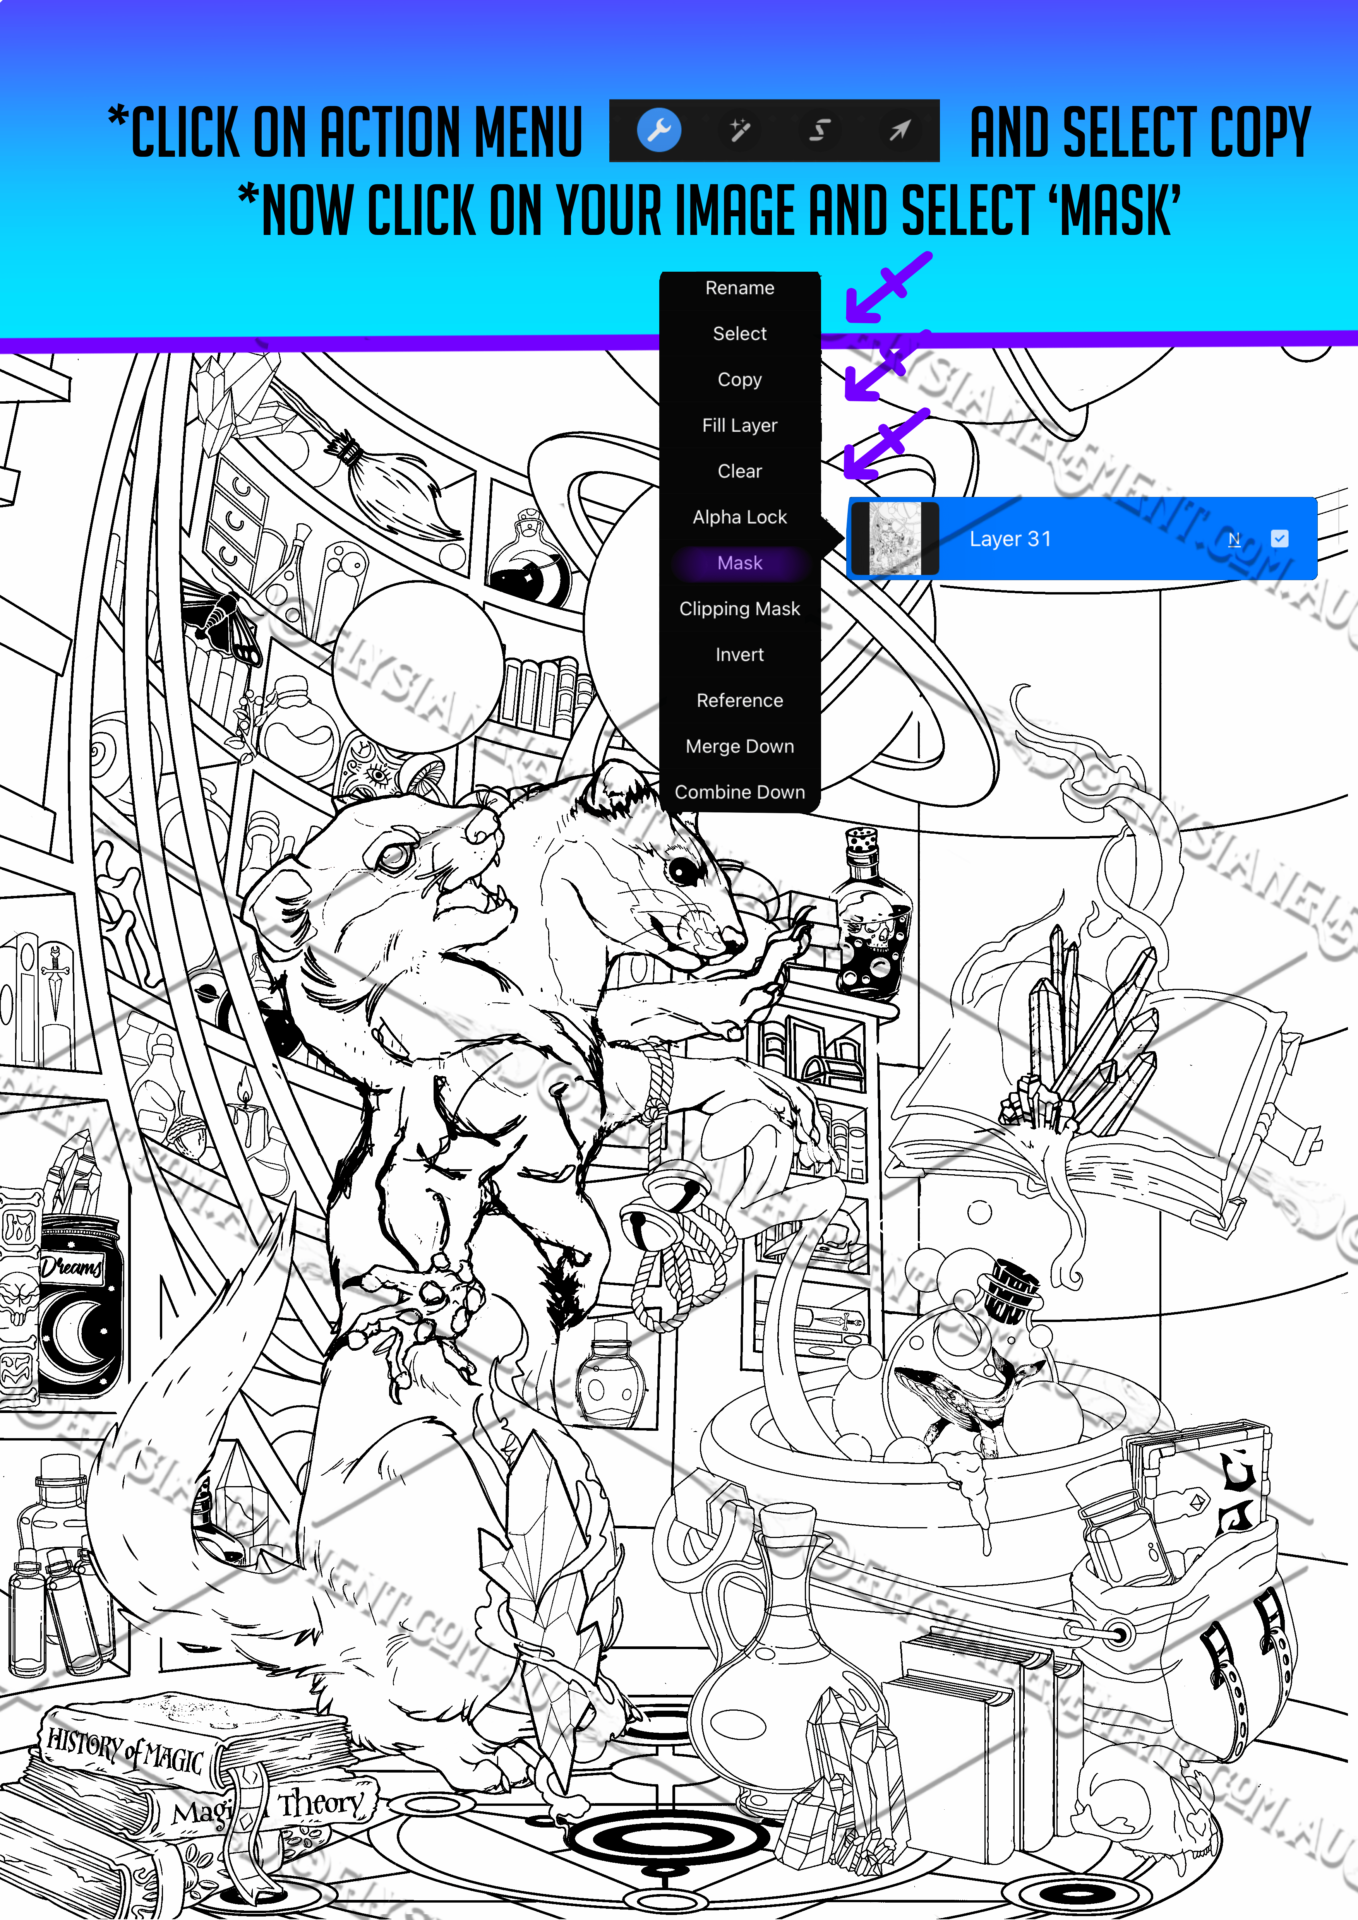
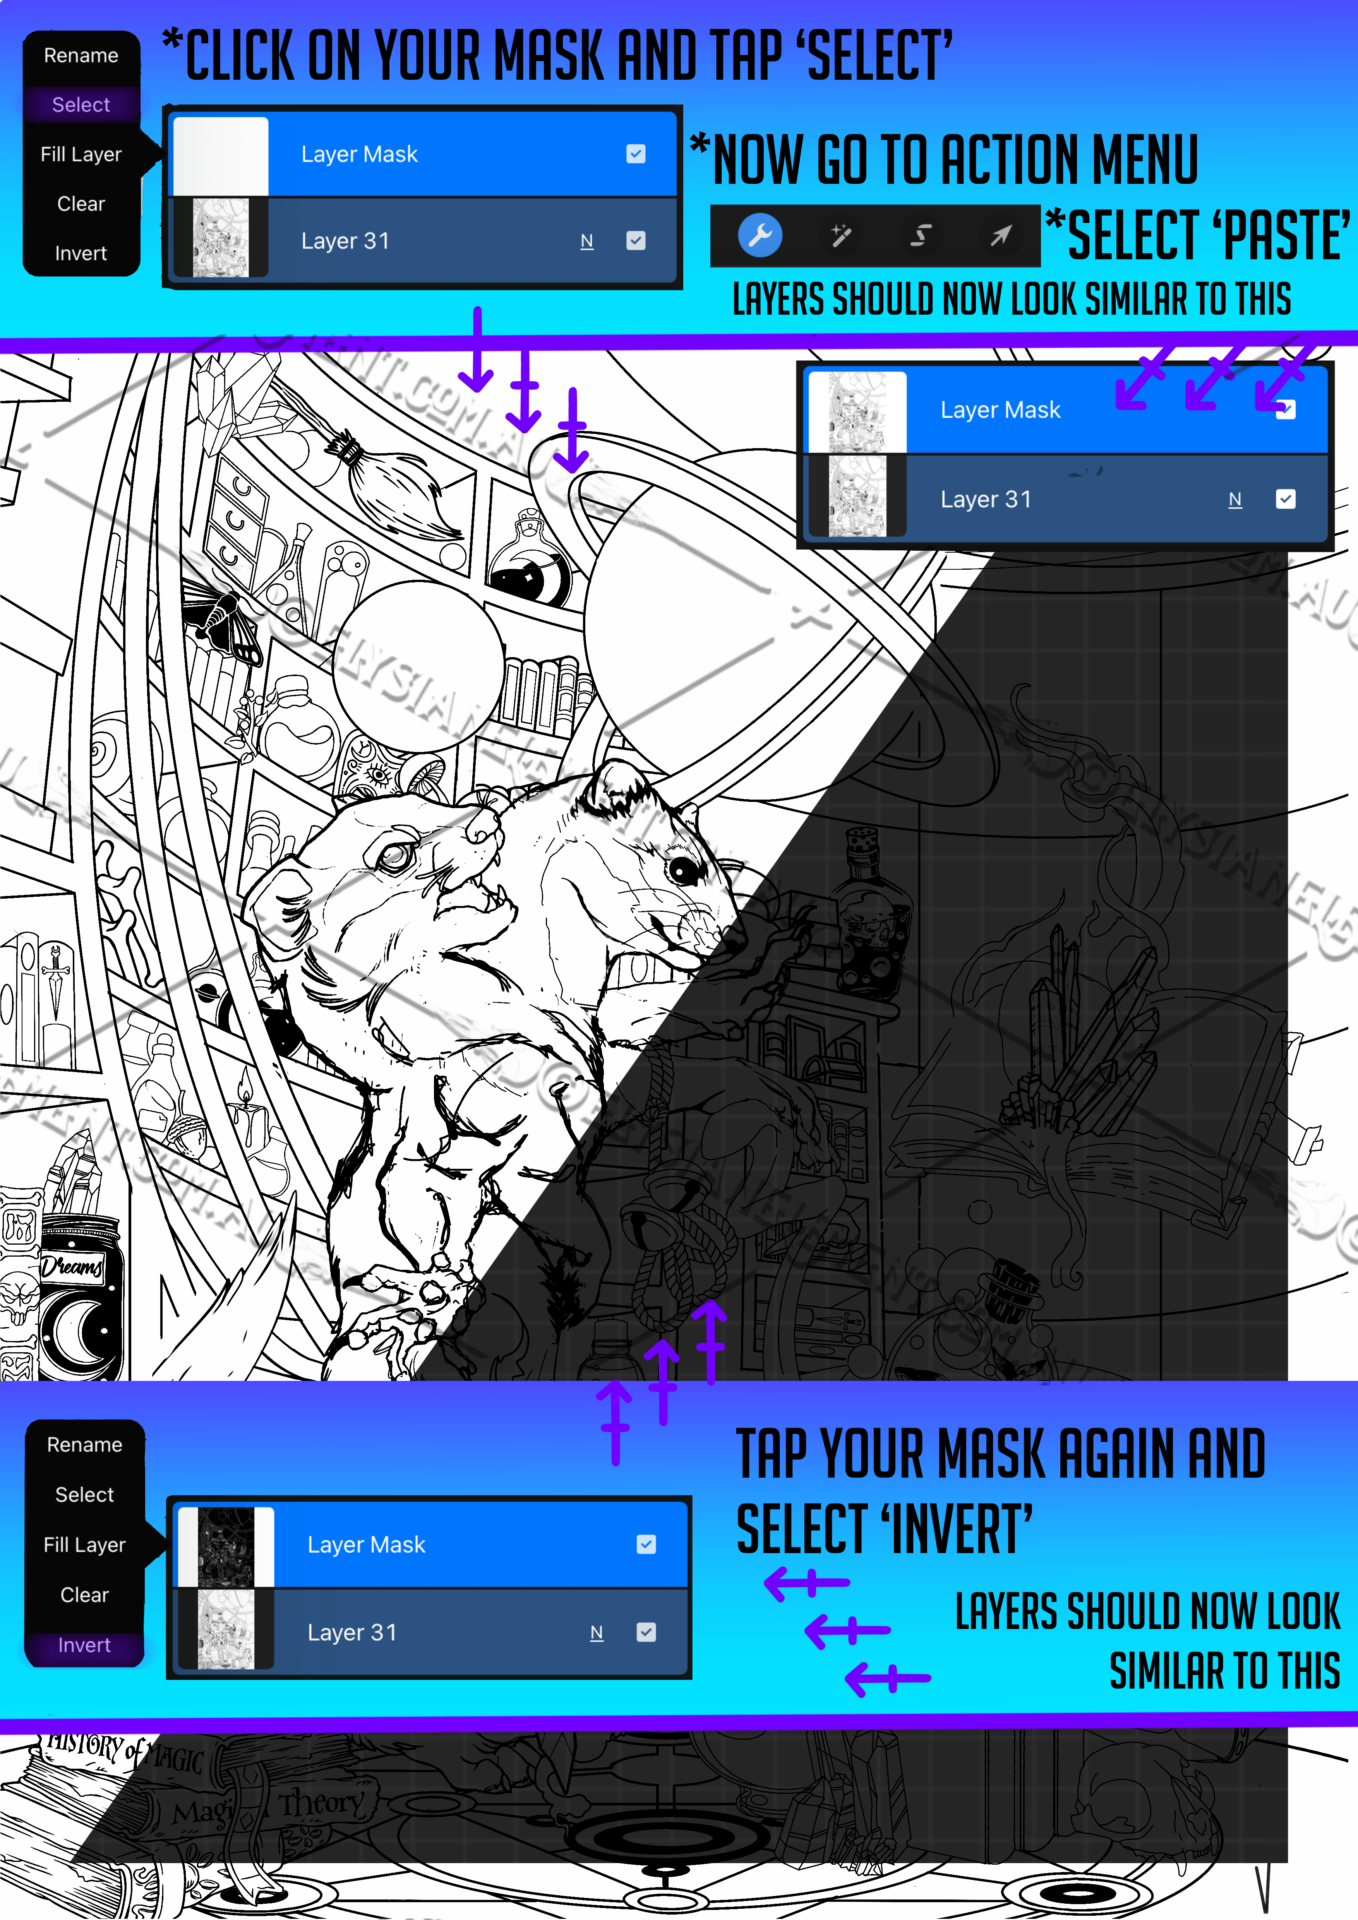
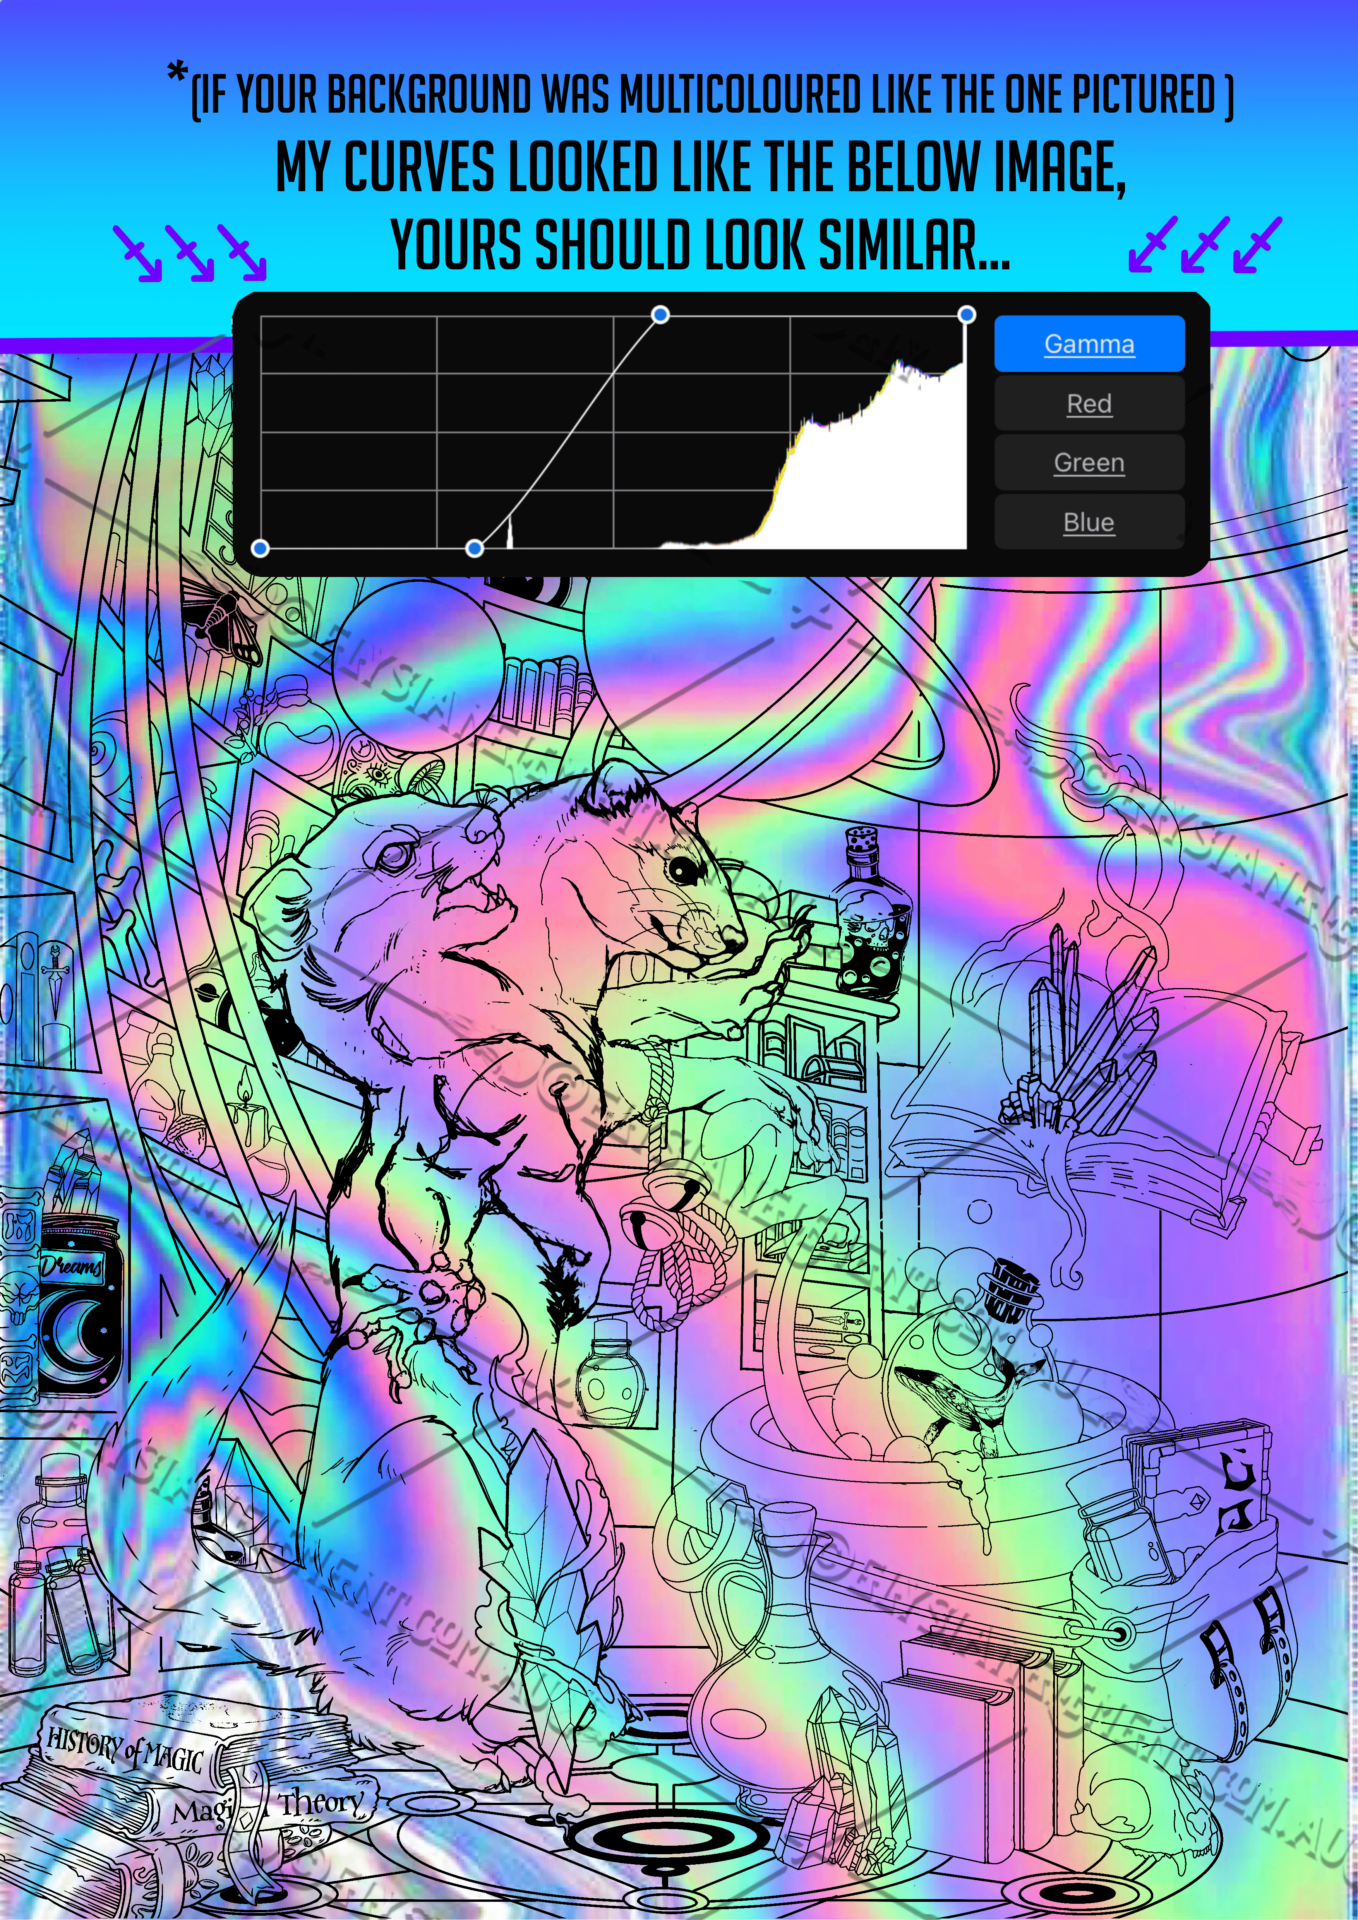
Using Procreate’s layer and clipping masks, I’ll demonstrate how to:
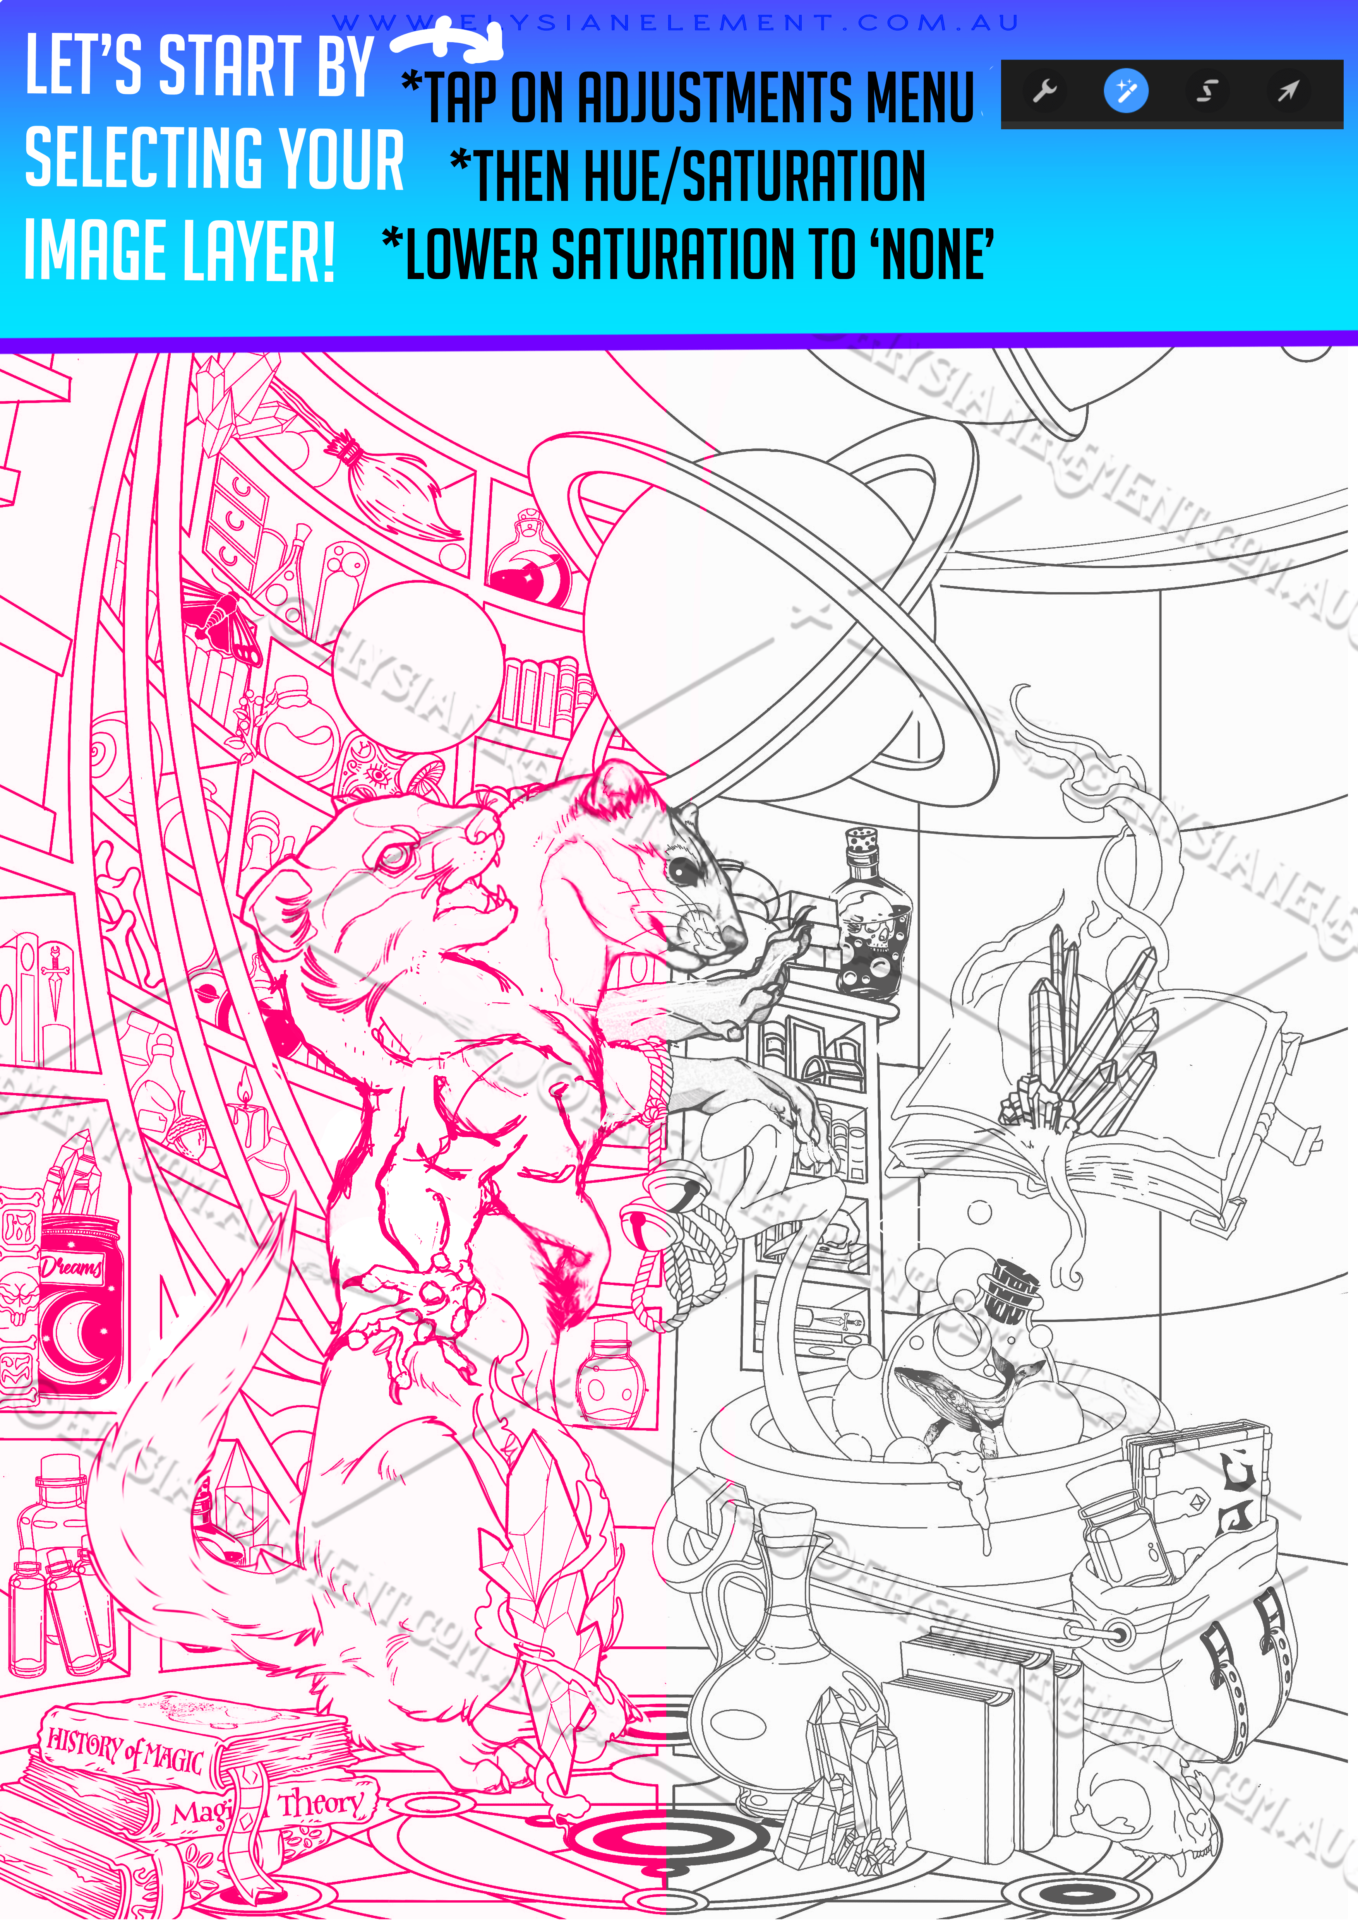
Select layer content and add mask to selected layer content only
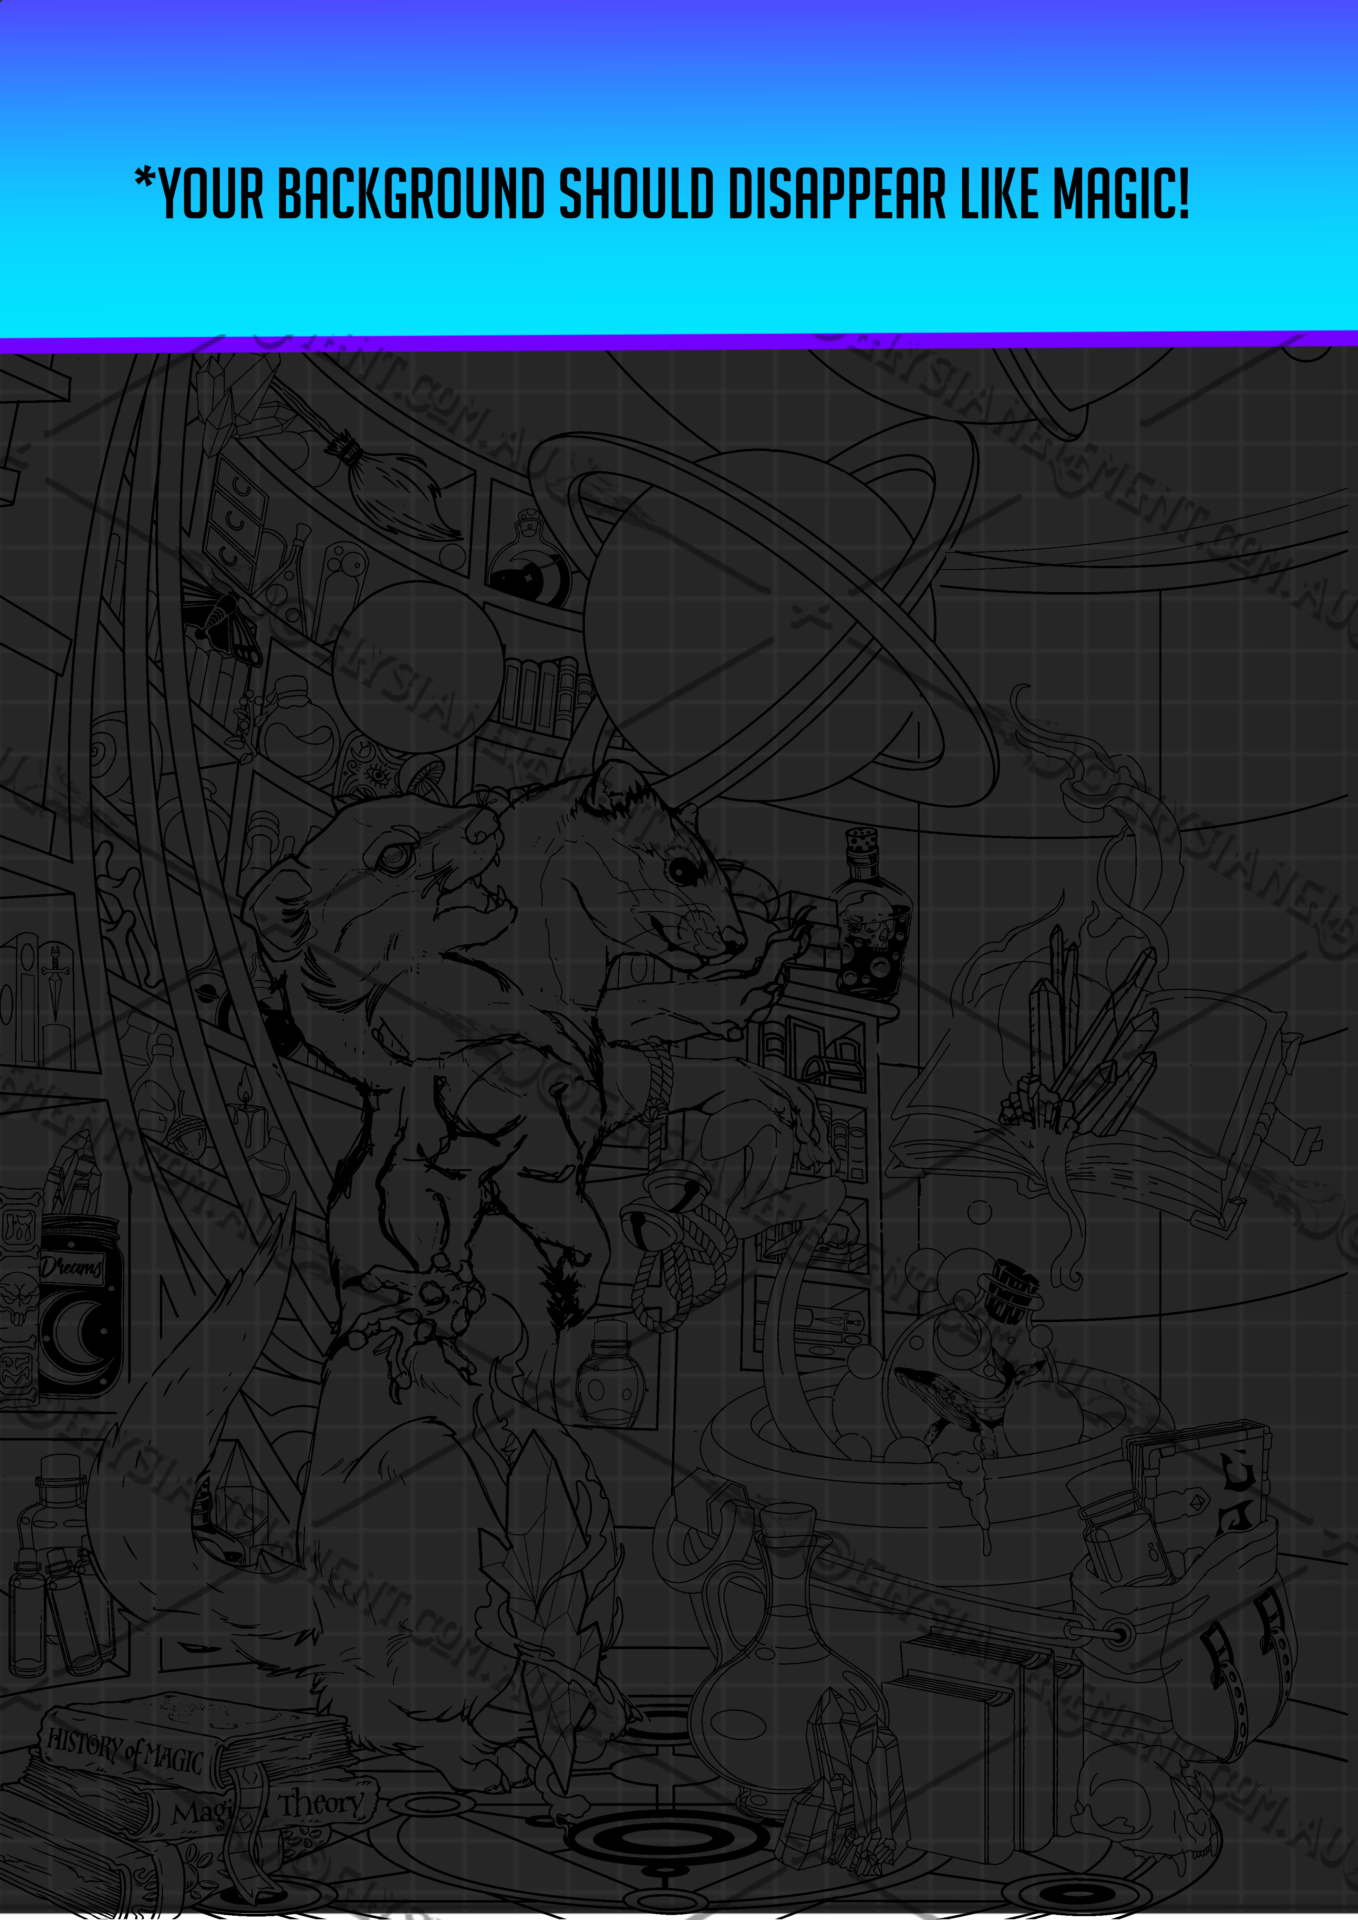
Paint with black and white to hide or reveal areas
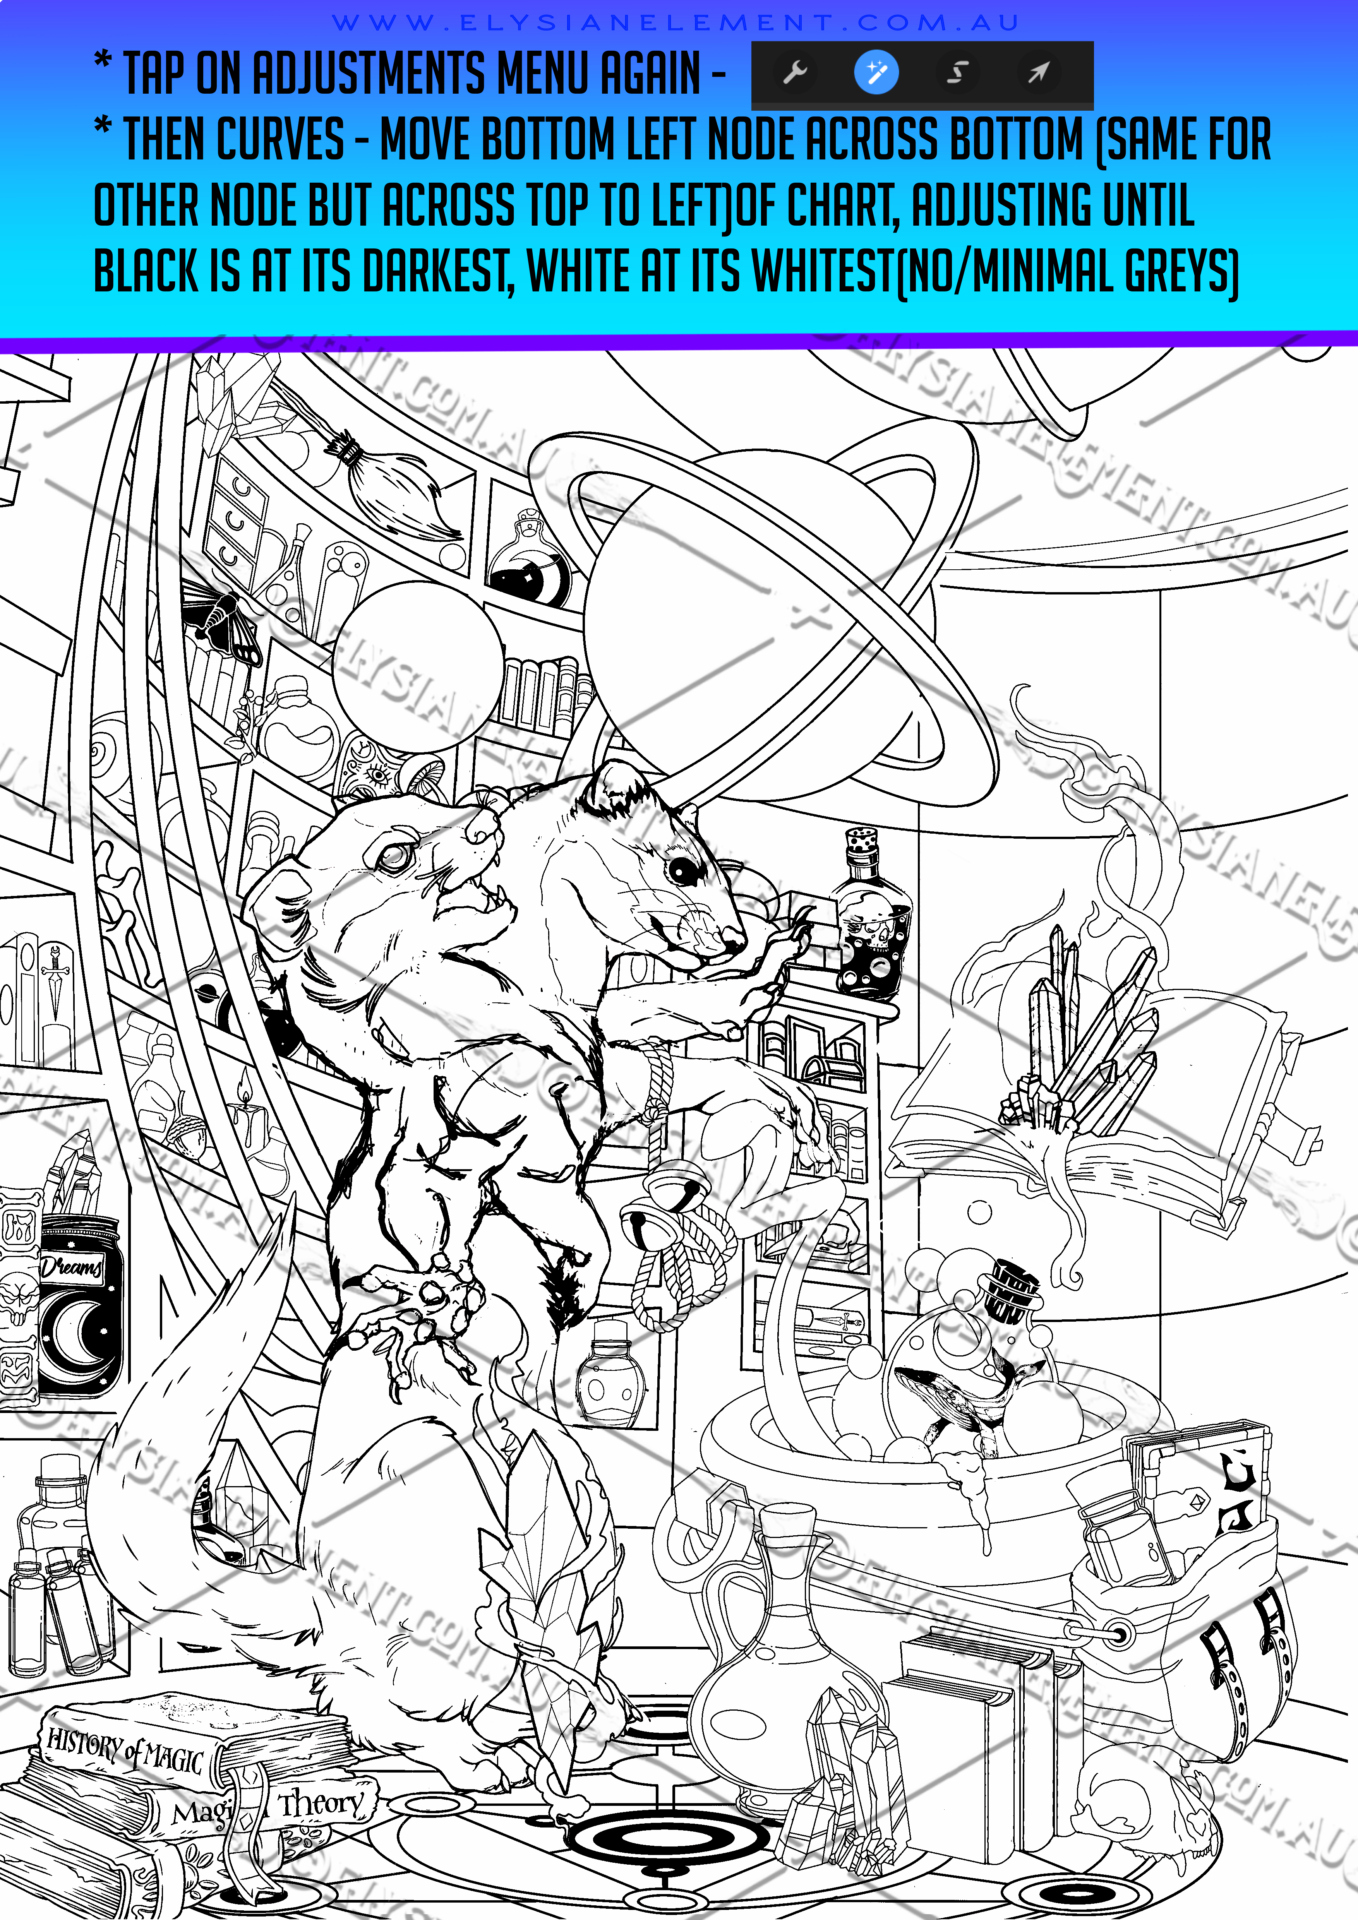
Control transparency using black and white only
Build complex effects using multiple masks
- Add selection to a masked layer and separate black from white